Conversions Basics
Conversions are user-defined data transformers supporting data format and data structure changes. They are useful when the source data does not match the destination data.
An example conversion is defining and modifying the destination data structure of extracted weather data. The data can be modified by applying functions. Functions include multiplying, dividing, adding a prefix, etc.
Configuring Conversions
Before you can configure a Conversion, you must have a Protocol defined.
To configure a Protocol, please see the Protocol guide page.
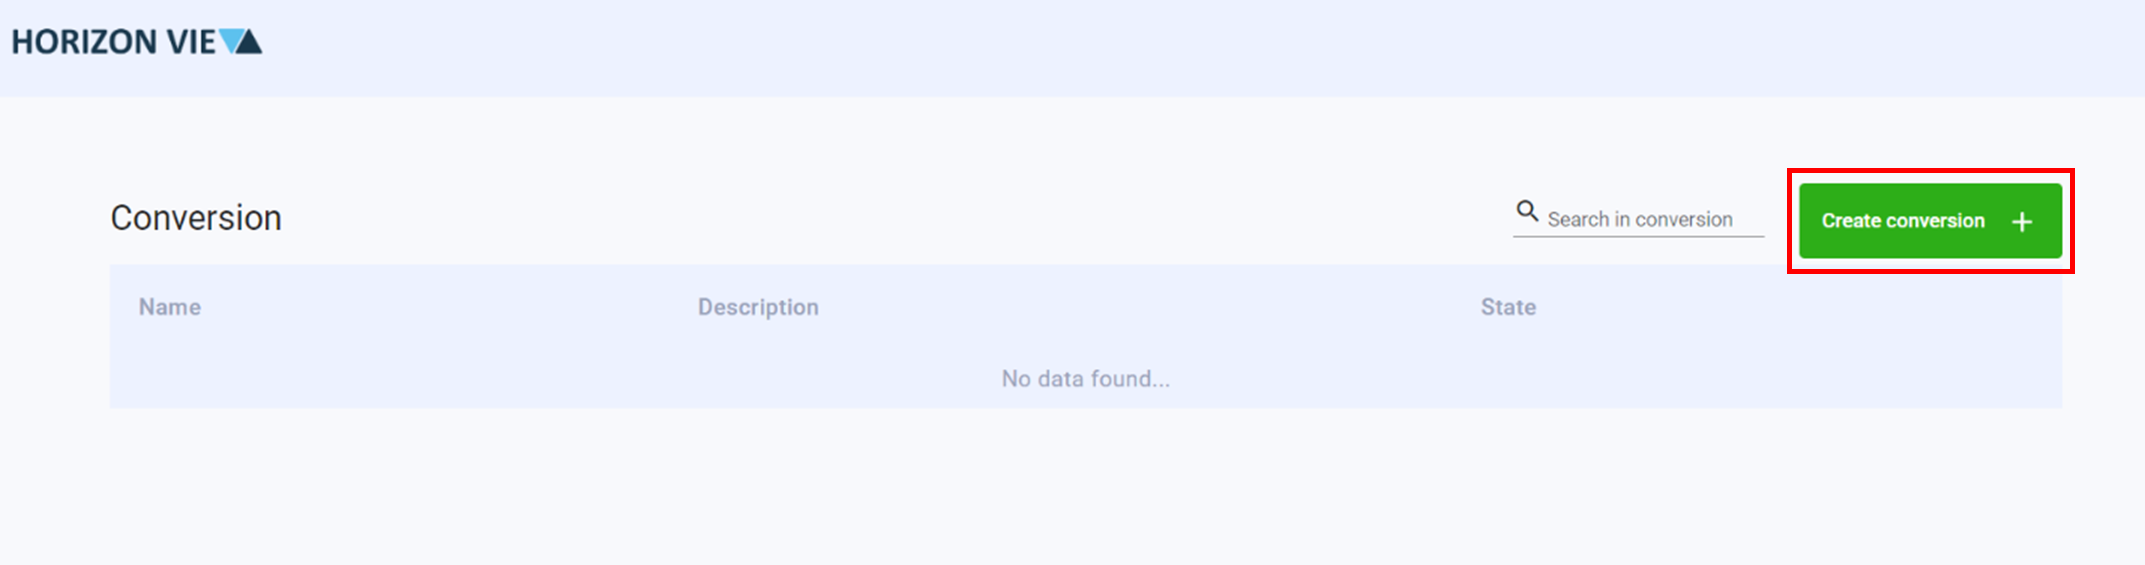
Create a Conversion
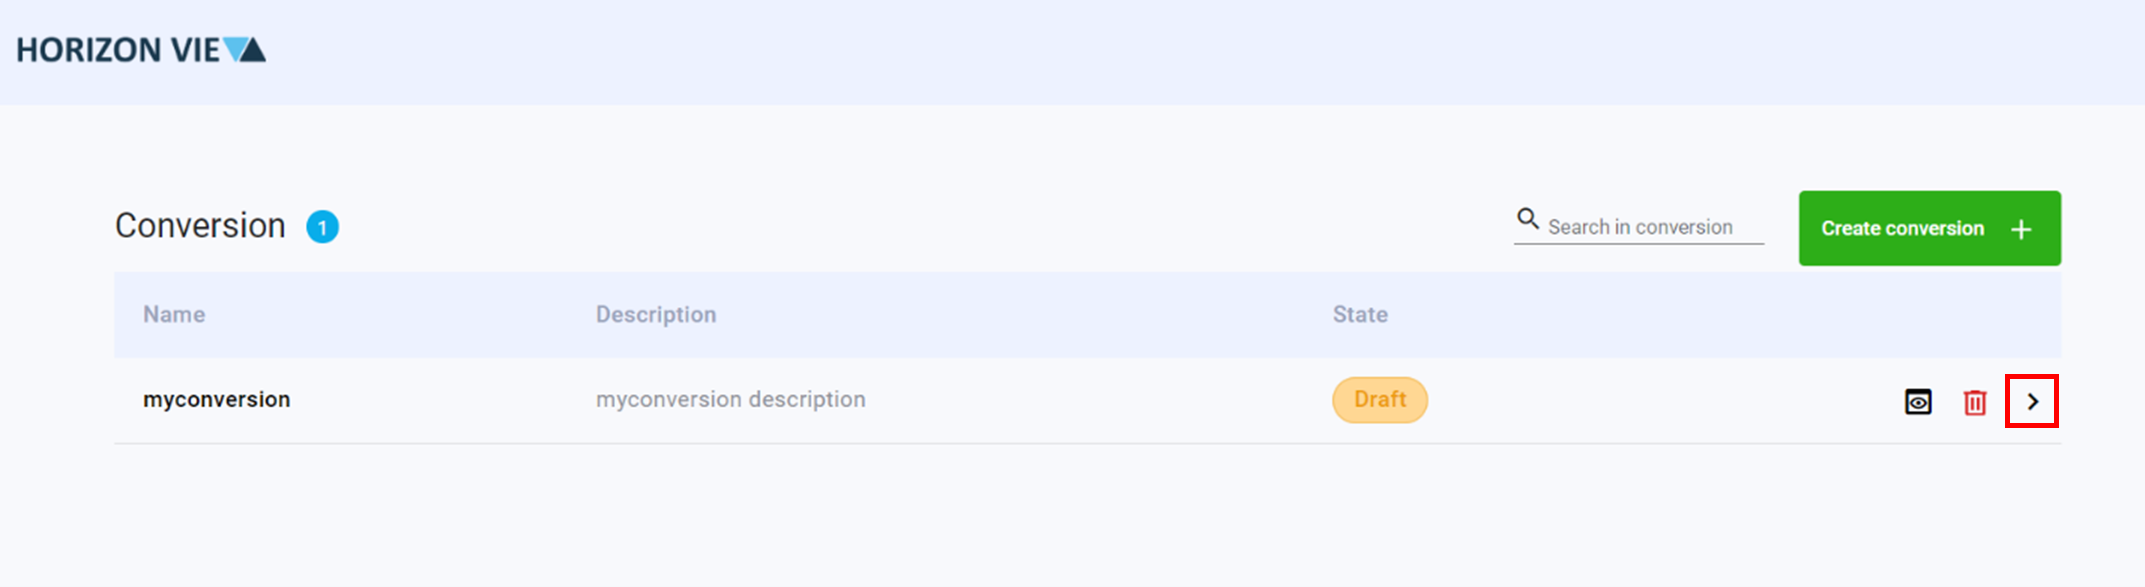
To create a conversion, enter the ‘Data conversions’ page by clicking on the Data option in the menu screen.
Initial Conversion Definition
Click Create conversion +
Enter a name and description for your conversion
Select a protocol for your conversion
Click Create

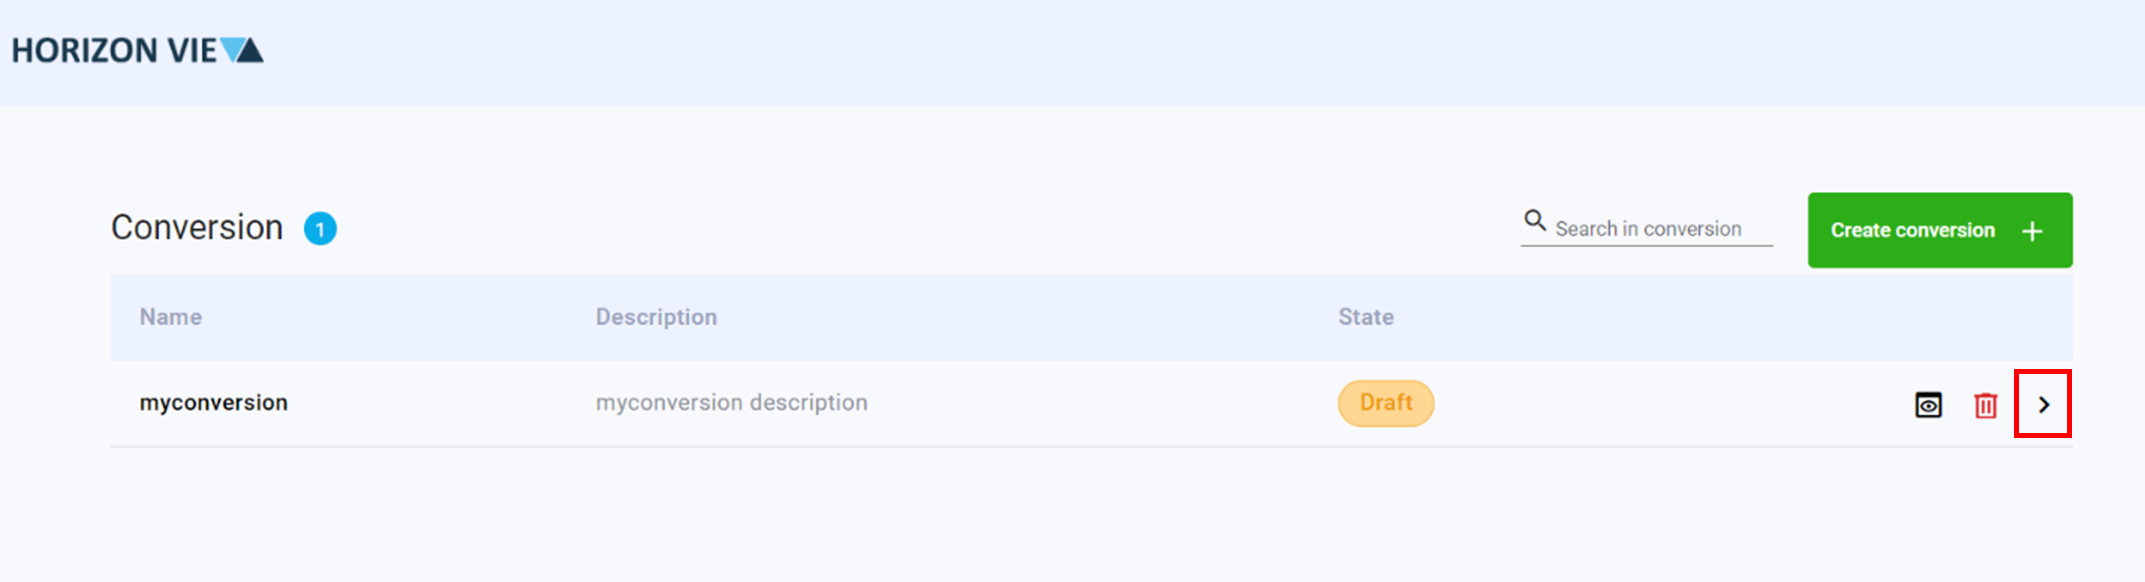
Click on the arrow to enter the conversion design space
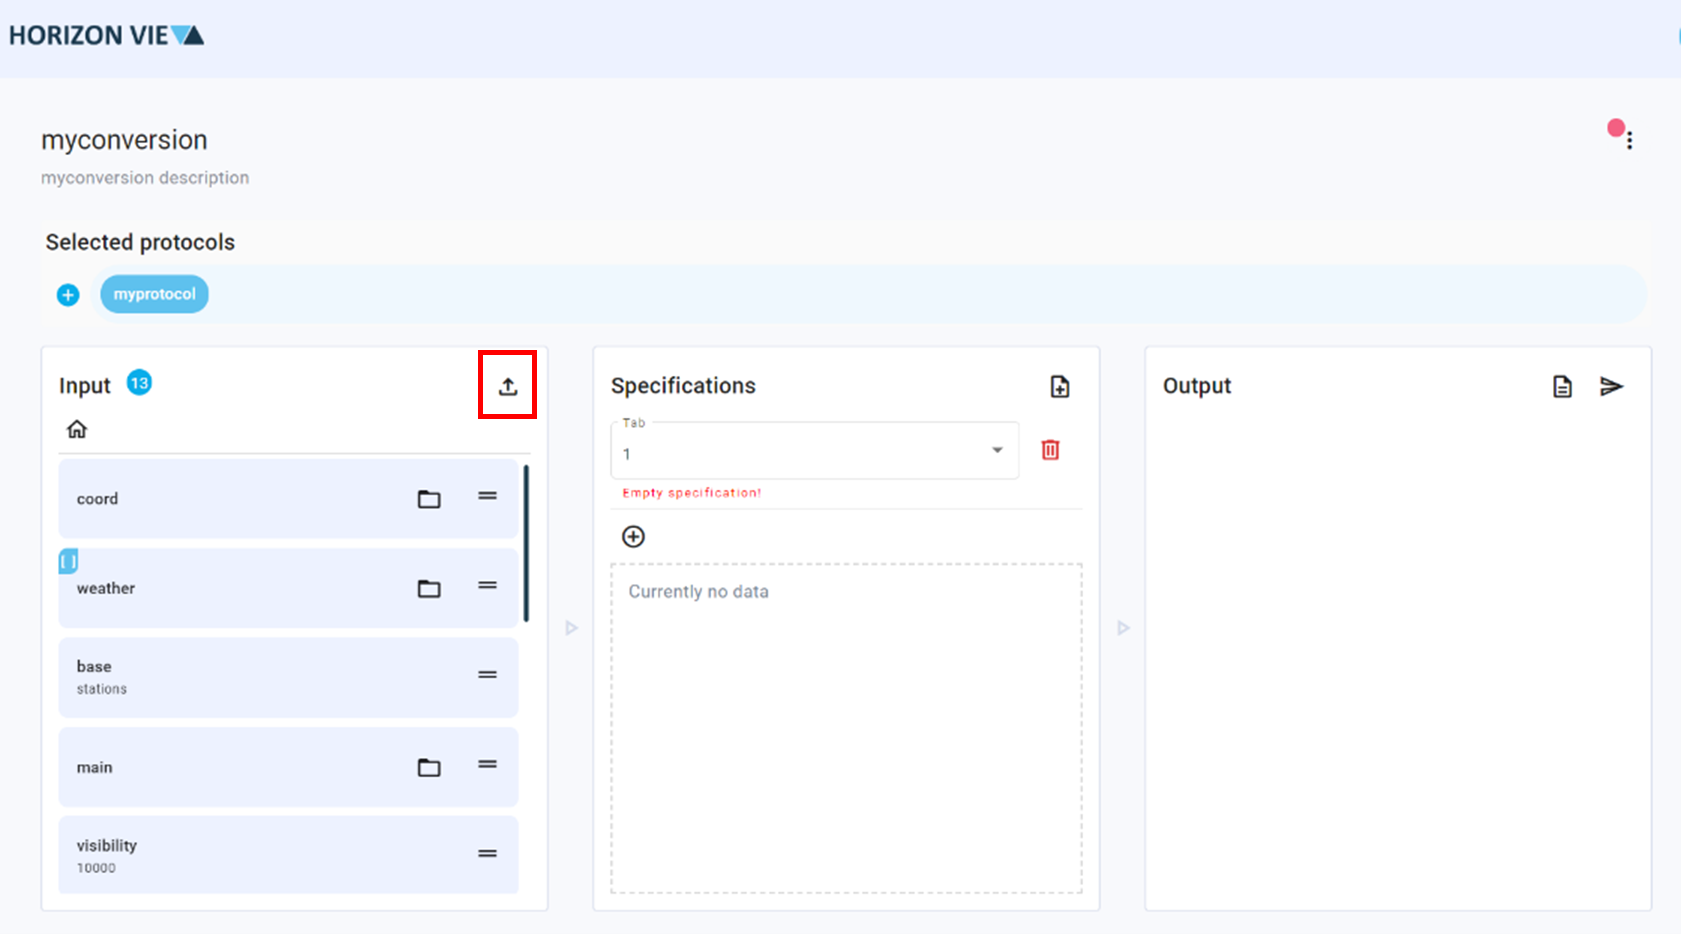
Conversion Design Space
Upload a JSON or XML file of the source data structure.
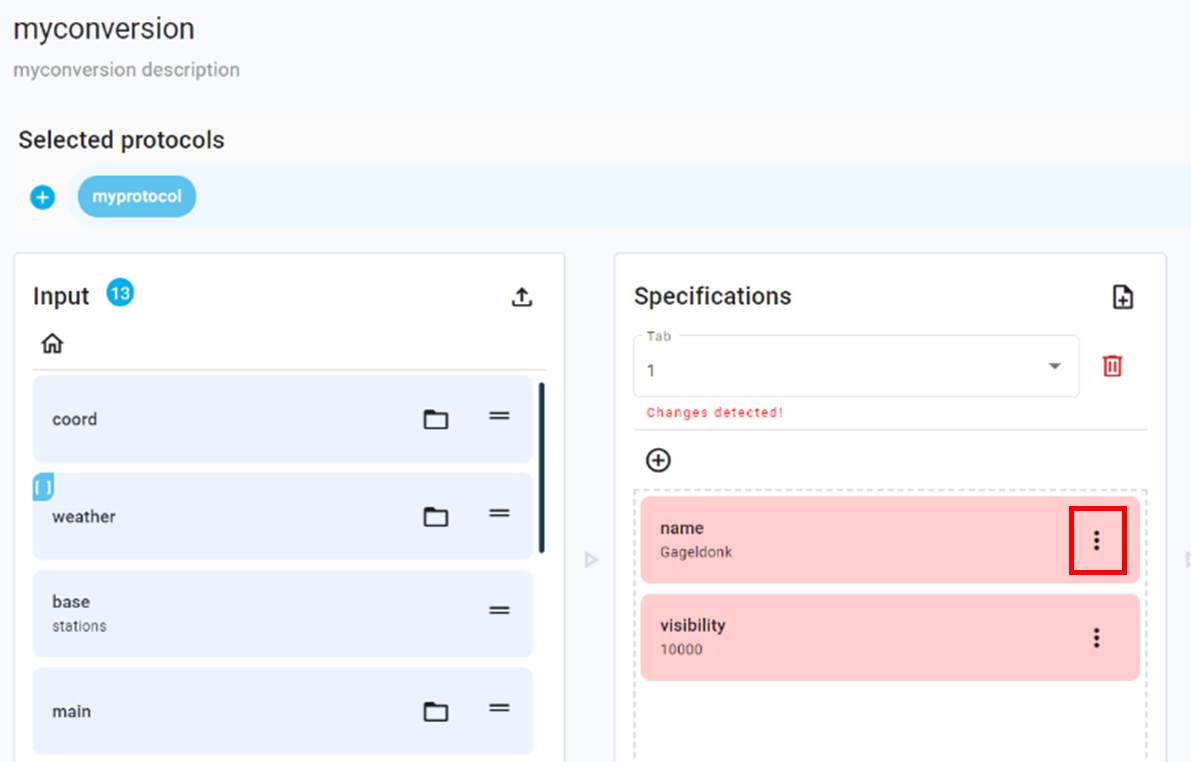
Drag and drop the required fields into the middle panel (Specifications panel)
Click on the three dots of the dropped field in the middle panel
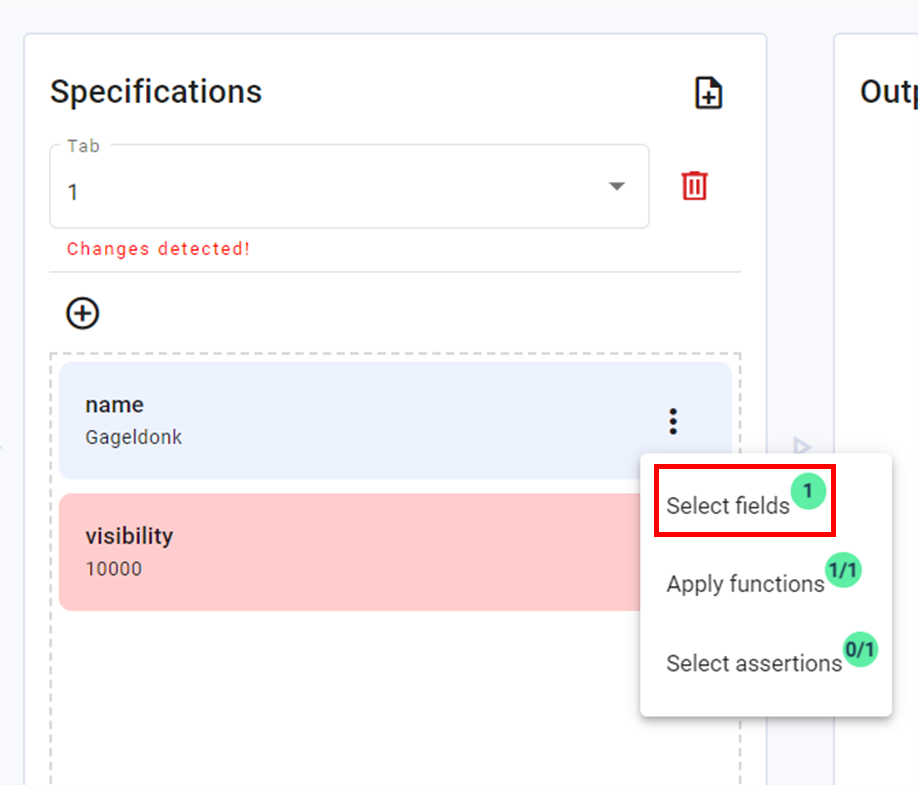
Click on Select fields
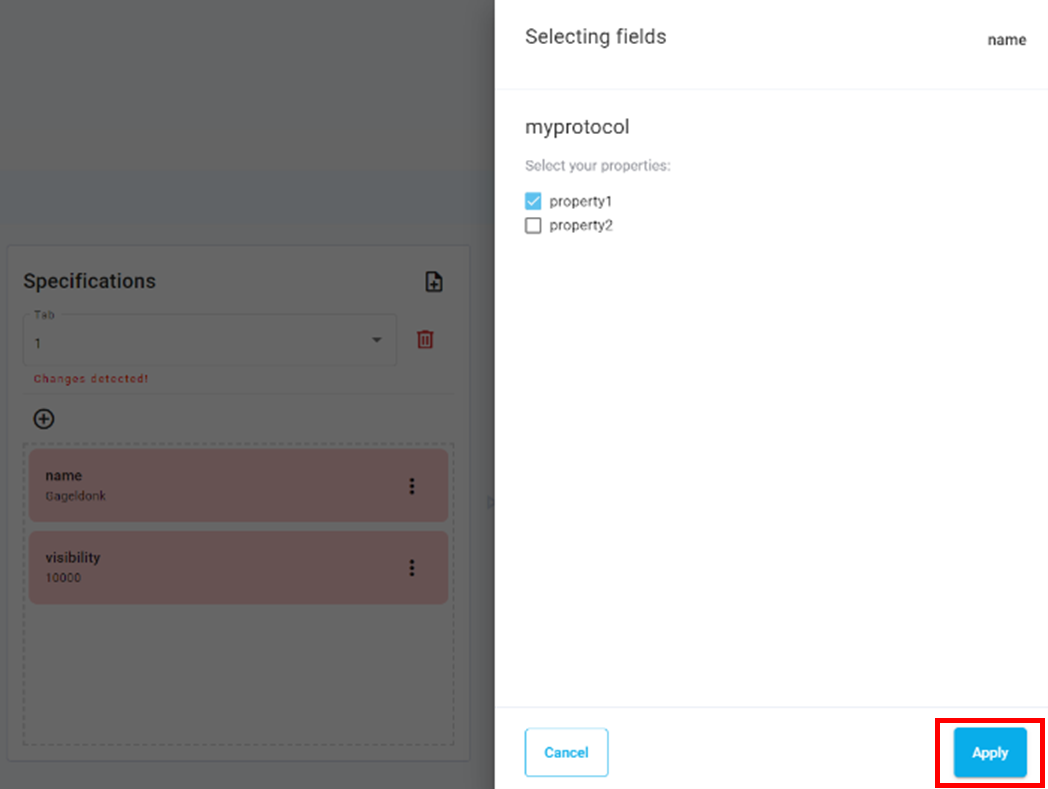
Select the relevant protocol property(s)
Click Apply
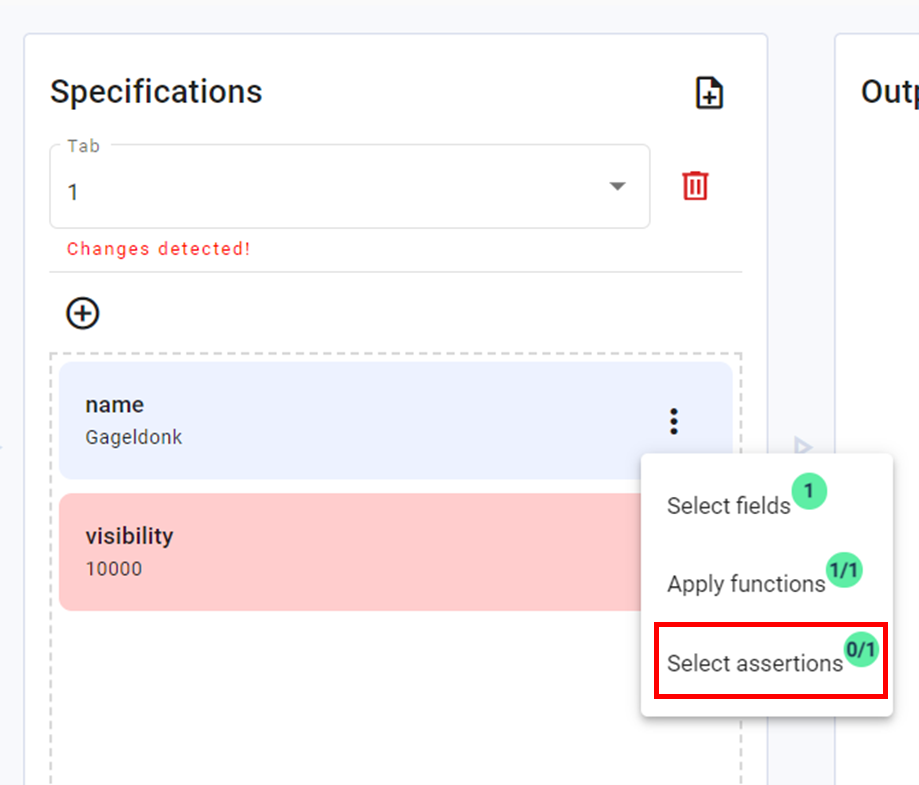
Click on the three dots again of the dropped field in the middle panel
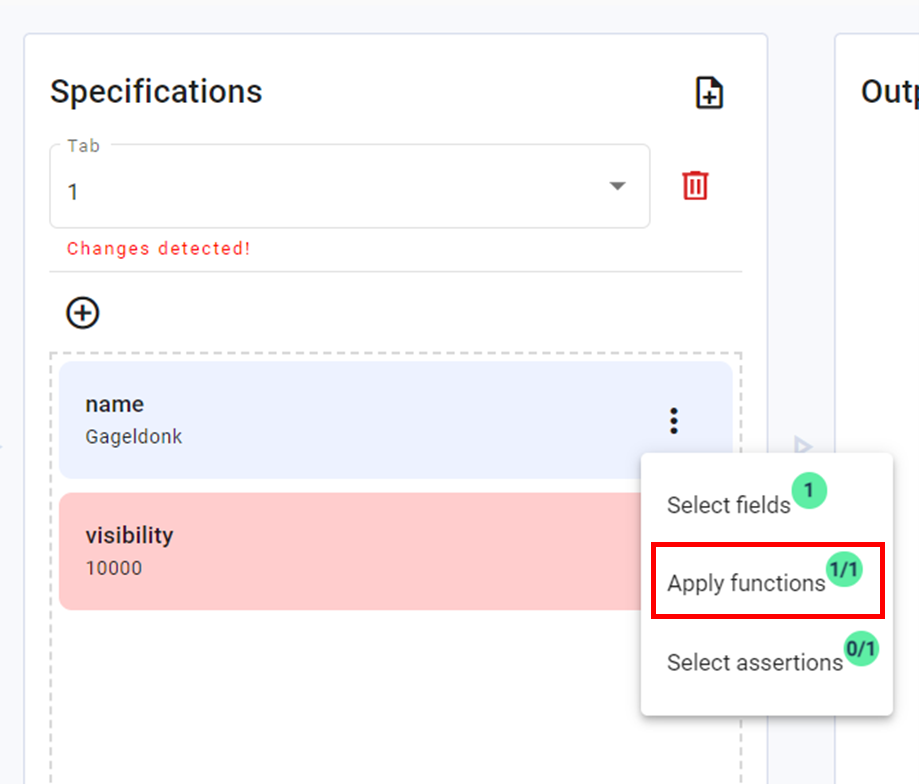
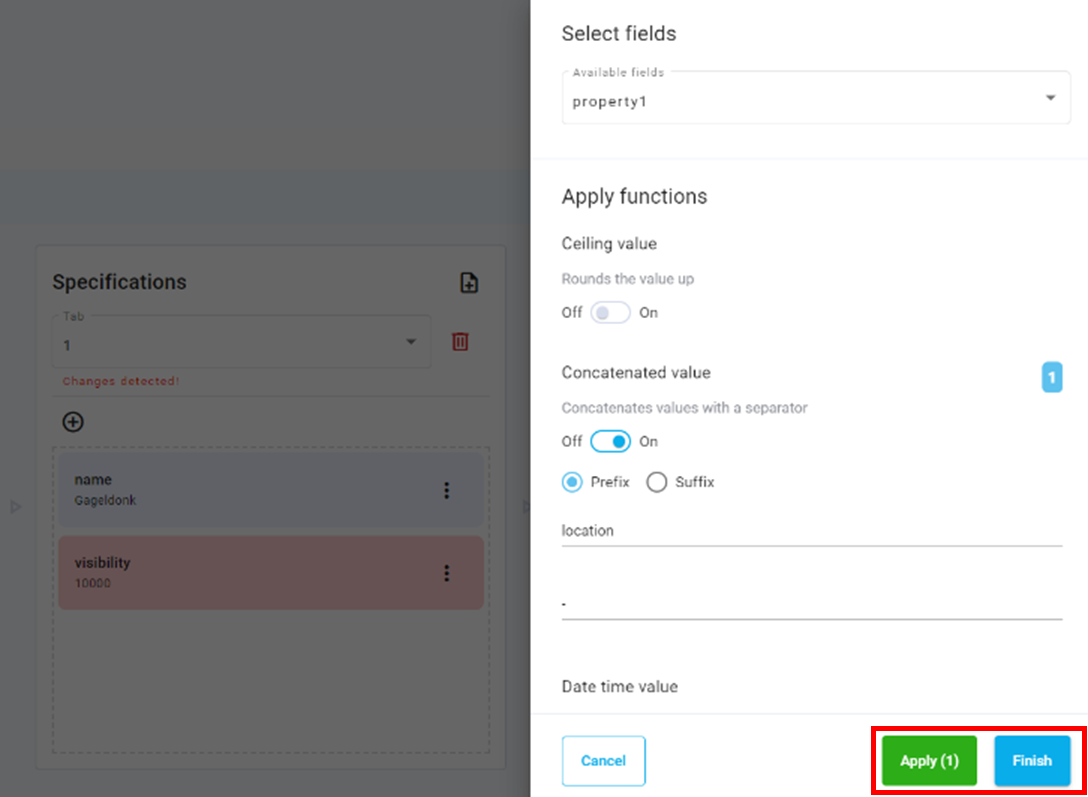
Click on Apply functions
Click on Available fields and select the relevant protocol property to modify
Configure relevant functions for your data
Click Apply and then Finish
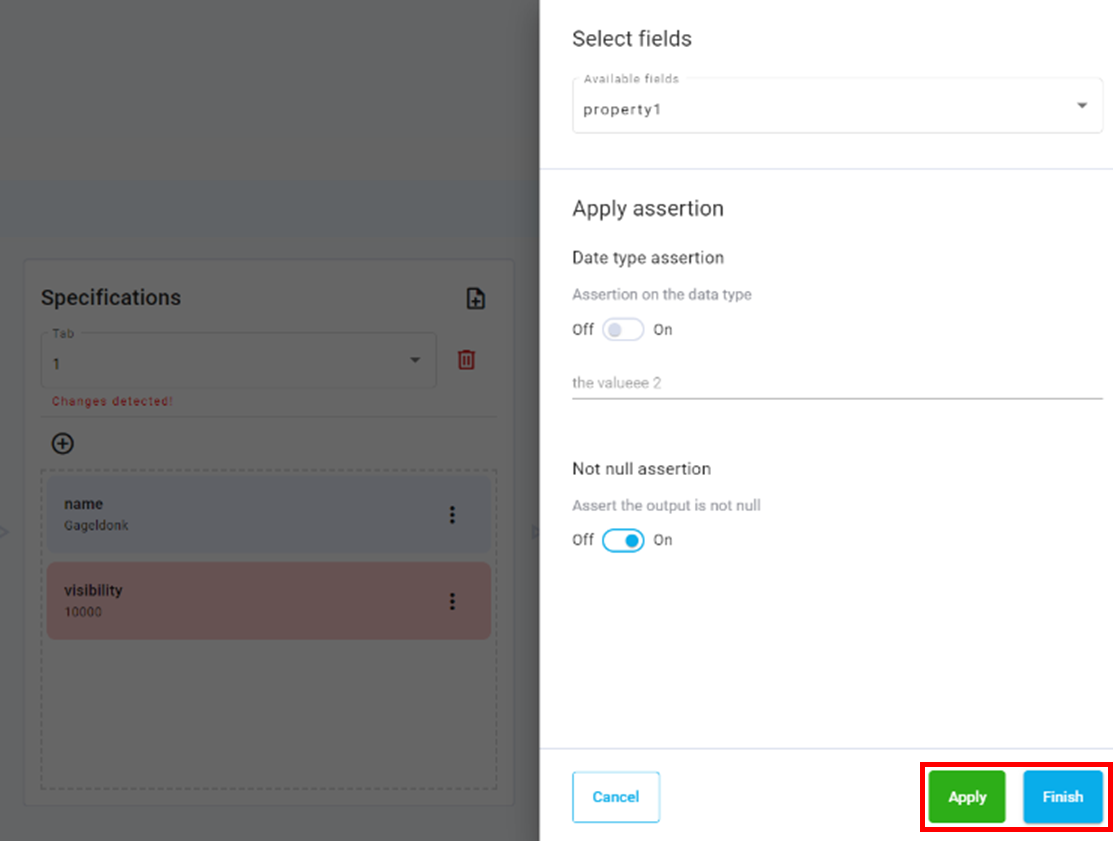
Click on Select assertions if required and select the relevant protocol property
Configure relevant assertions for your data
Click Apply and then Finish
Repeat steps 2-14 as necessary
Click Generate output icon in the output panel
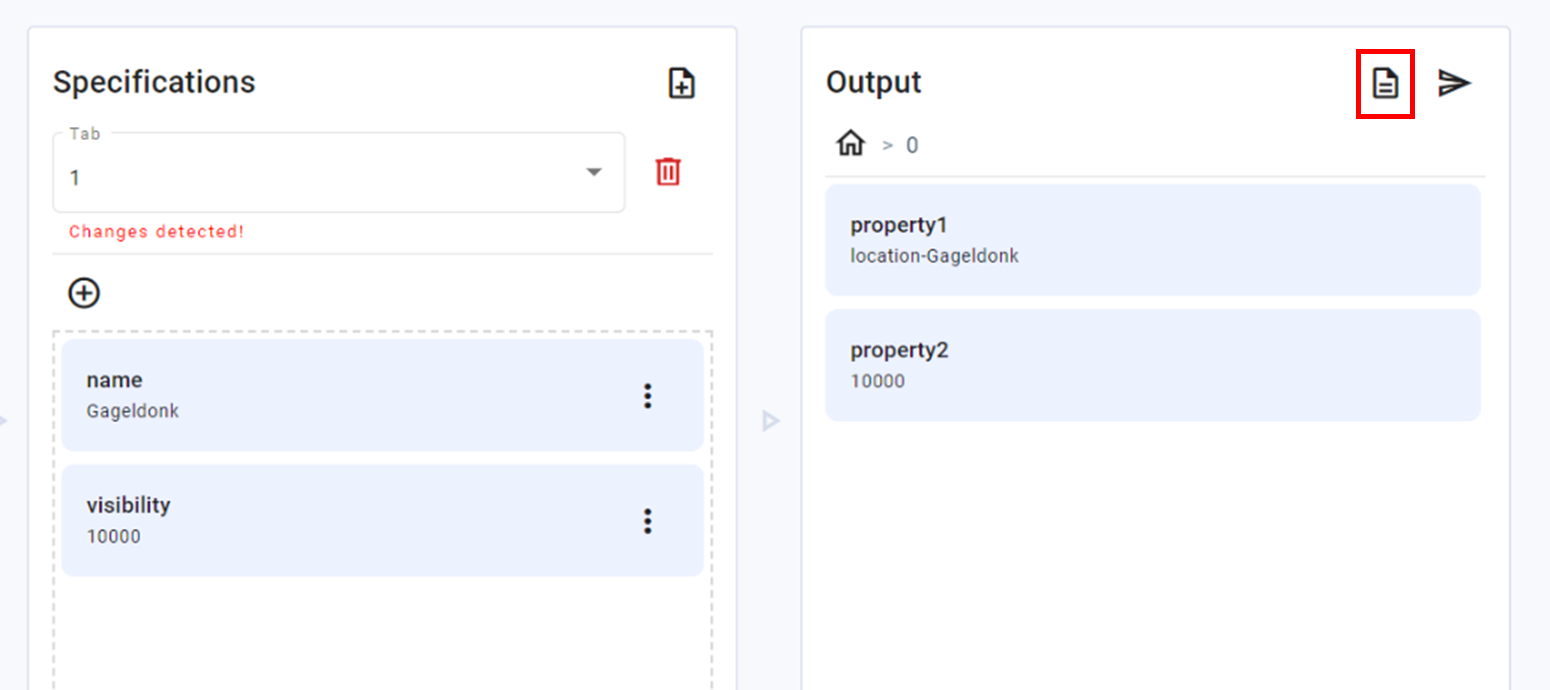
Verify output matches your destination data structure
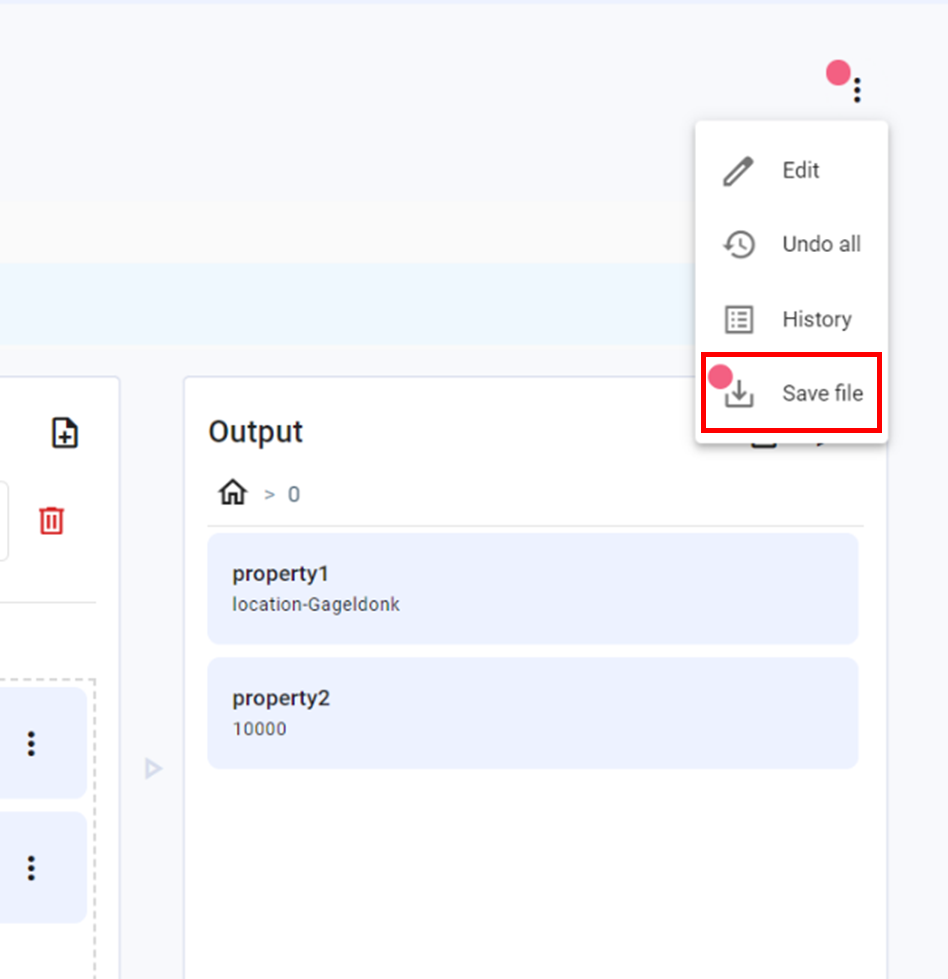
Click on the three dots on the top right corner
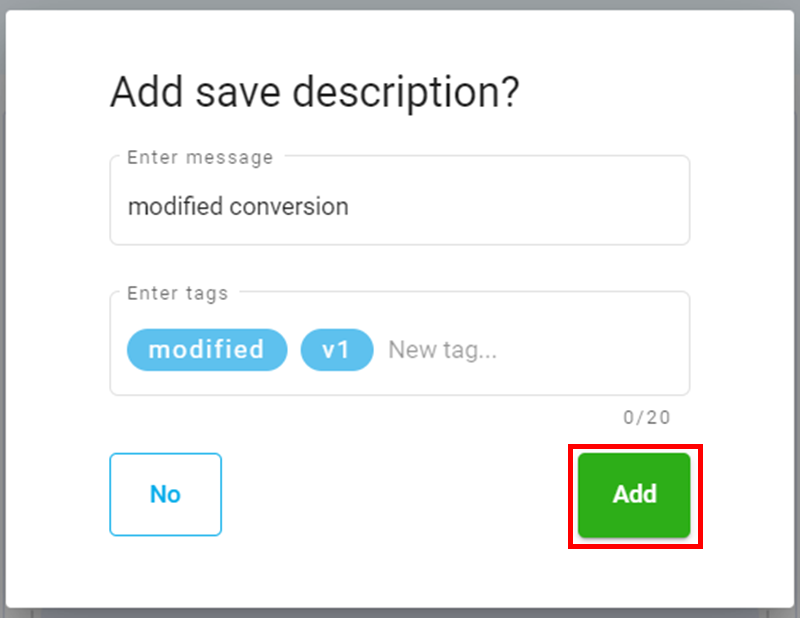
Click Save
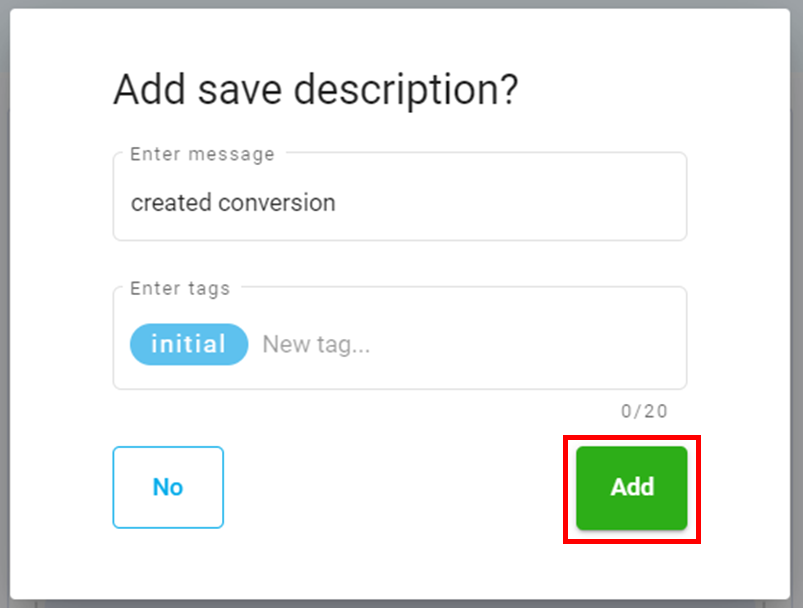
Add a save description if necessary
Click Add
Deploy a Conversion
To deploy a conversion, enter the ‘Data conversions’ page by clicking on the Data option in the menu screen.
To use a conversion in a workflow, the conversion must first be deployed.
Click on the arrow of your conversion to enter the conversion design space

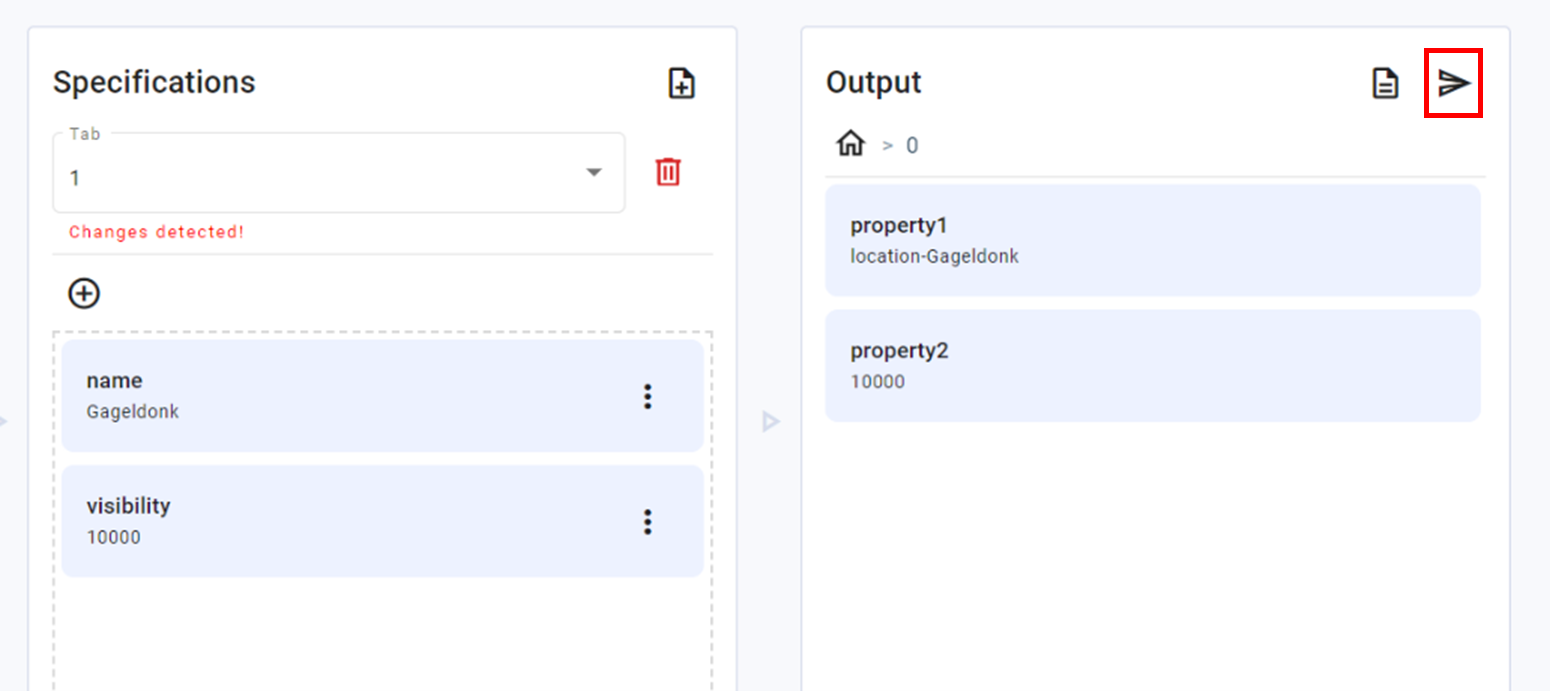
In the Output Panel, click on the arrow to deploy the conversion.
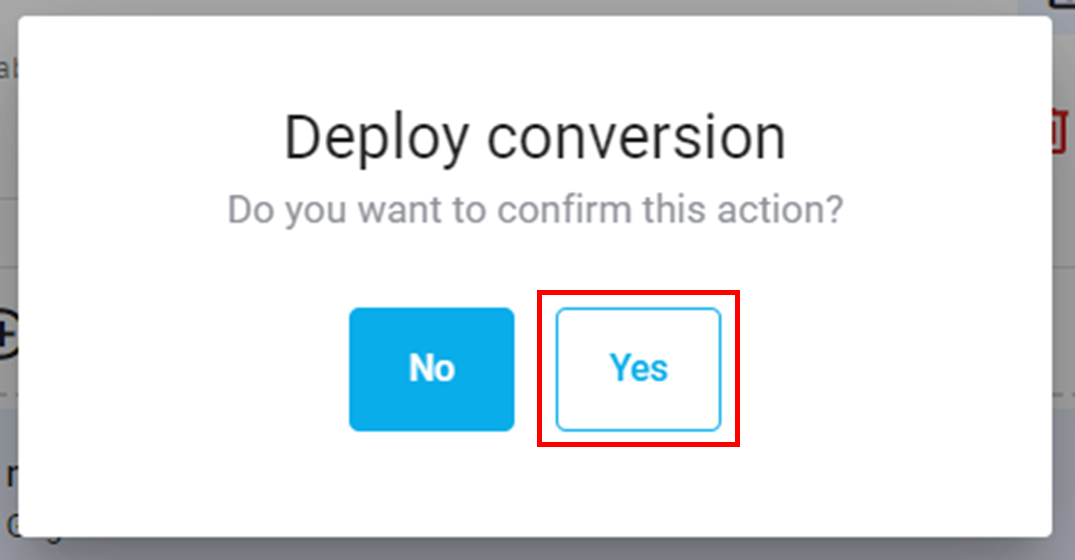
Click Yes
Modify a Conversion
To modify a conversion, enter the ‘Data conversions’ page by clicking on the Data option in the menu screen.
Click on the arrow of your conversion to enter the conversion design space
Modify the conversion as necessary
Click on the three dots on the top right corner
Click Save

Add a save description if necessary
Click Add
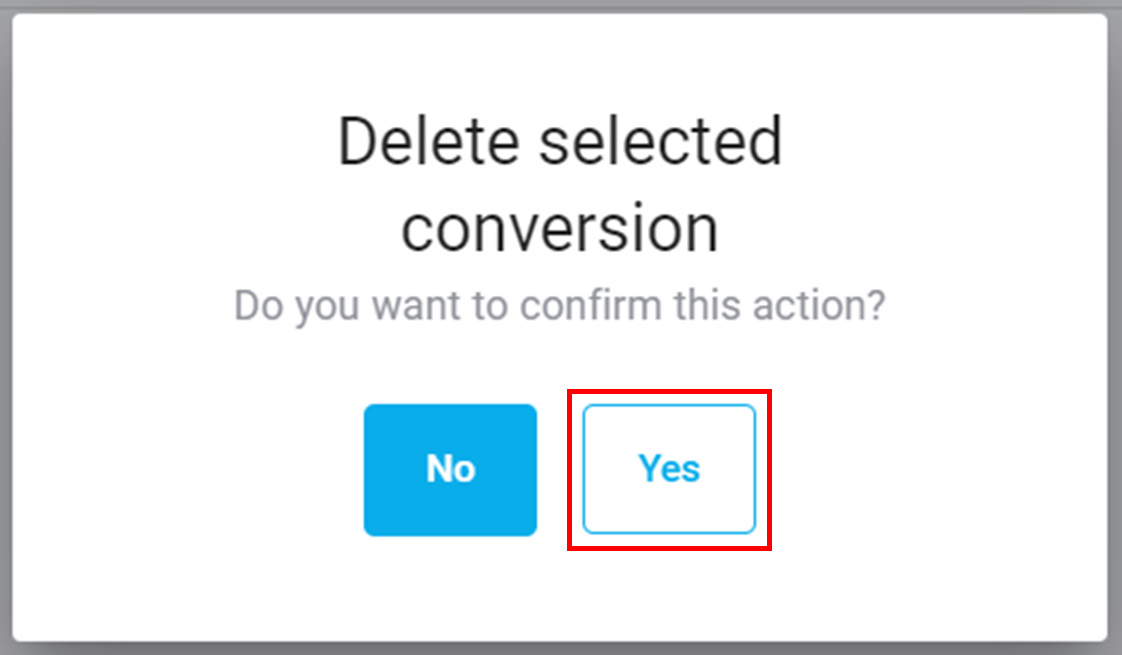
Remove a Conversion
To remove a conversion, enter the ‘Data conversions’ page by clicking on the Data option in the menu screen.
If you delete a conversion that is being used in a workflow, the workflow will fail.
Click on the trash icon next to the conversion to be removed
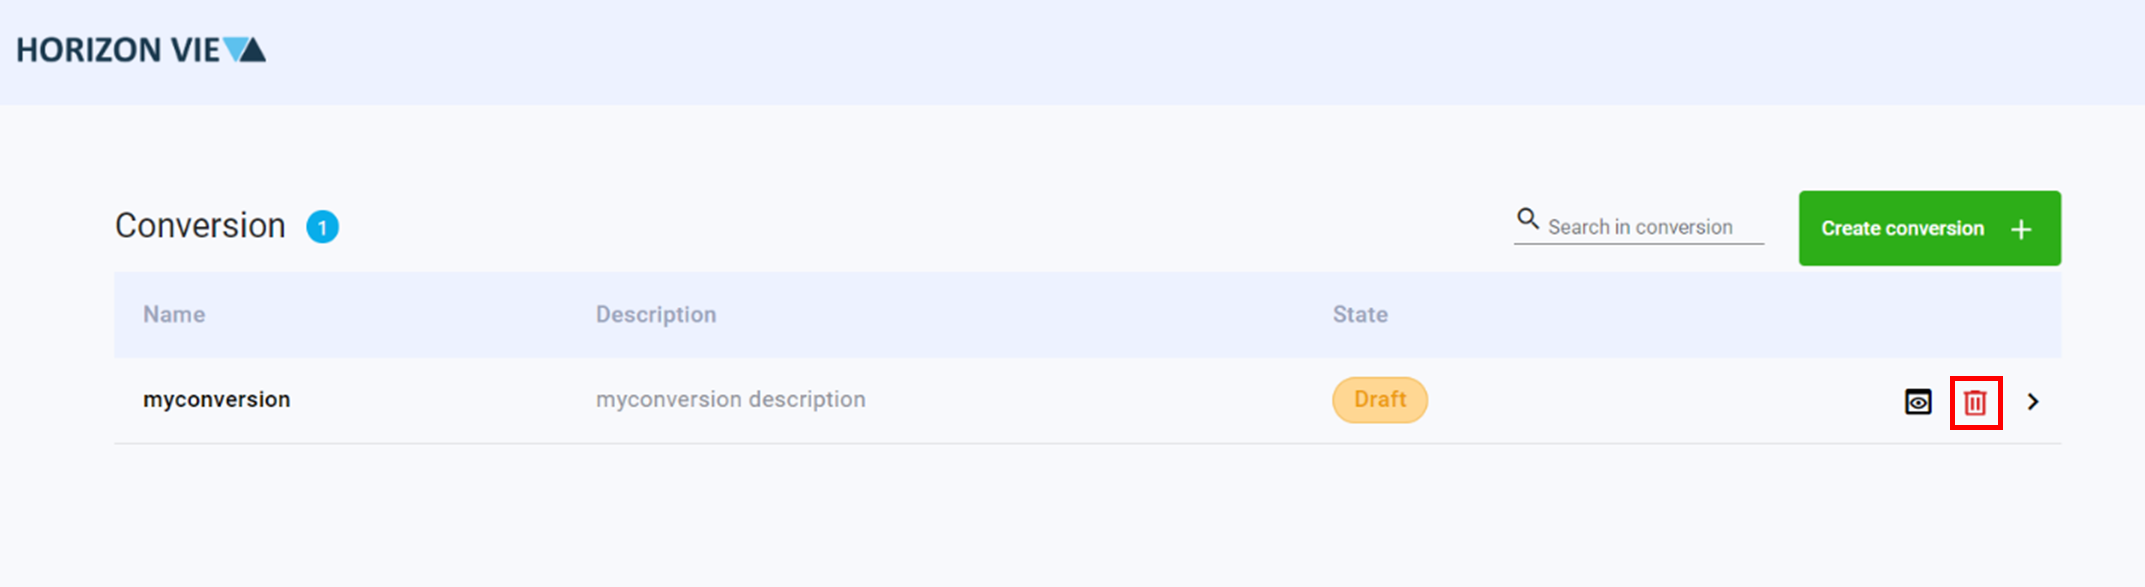
Click Yes to delete